Uploading is the start of the OCR workflow. You capture one or more documents, the app uploads them, and OCR reads the key fields automatically. You can upload several files at once. Before you start, make sure each document is well lit, flat, and fully in frame. Clearer images give more accurate OCR results.

Start an upload

Tap the + button (on the Home or Uploads screen) to open the capture menu. It has three options:
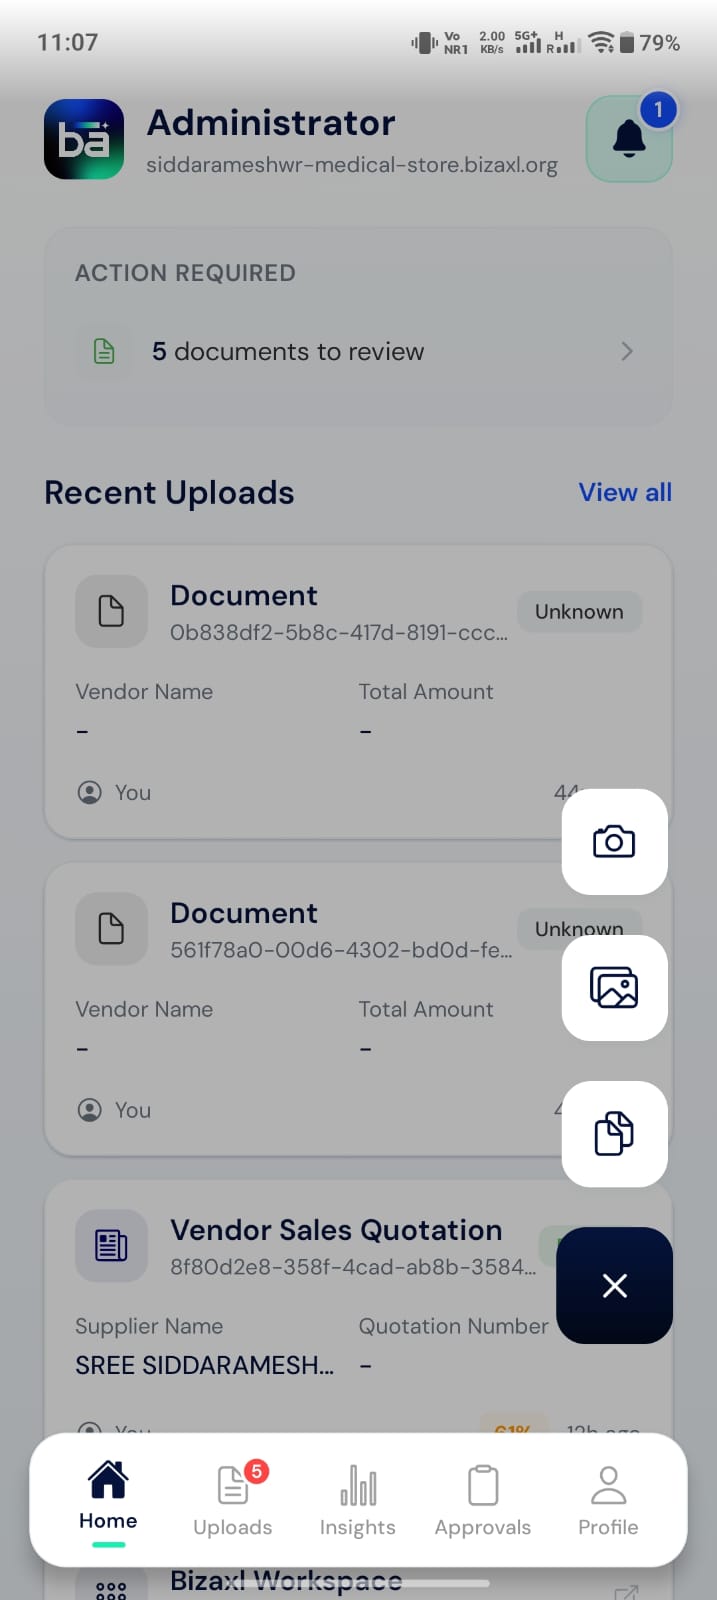
Upload menu showing Documents, Gallery, and Scan options
The capture buttons show icons only. The camera icon is the multi-page Scan option, not a single-photo camera. Use it to scan physical documents page by page.

Uploading and processing

Once you choose your files, the app uploads them and begins processing. Each file shows its own status and a progress bar, and the header shows overall progress such as 0/1 complete.

Upload progress screen showing a file uploading and processing
Processing continues automatically after the upload finishes. Statuses update live, so you do not need to refresh.
If a file fails, open it and use Retry to reprocess it. Common causes are a blurry image or a missing required field.

Classifying the document type

If the app cannot determine the document type on its own, the file shows Select Type and the Select Document Type sheet appears. If a single file needs classification, the sheet opens for you automatically.
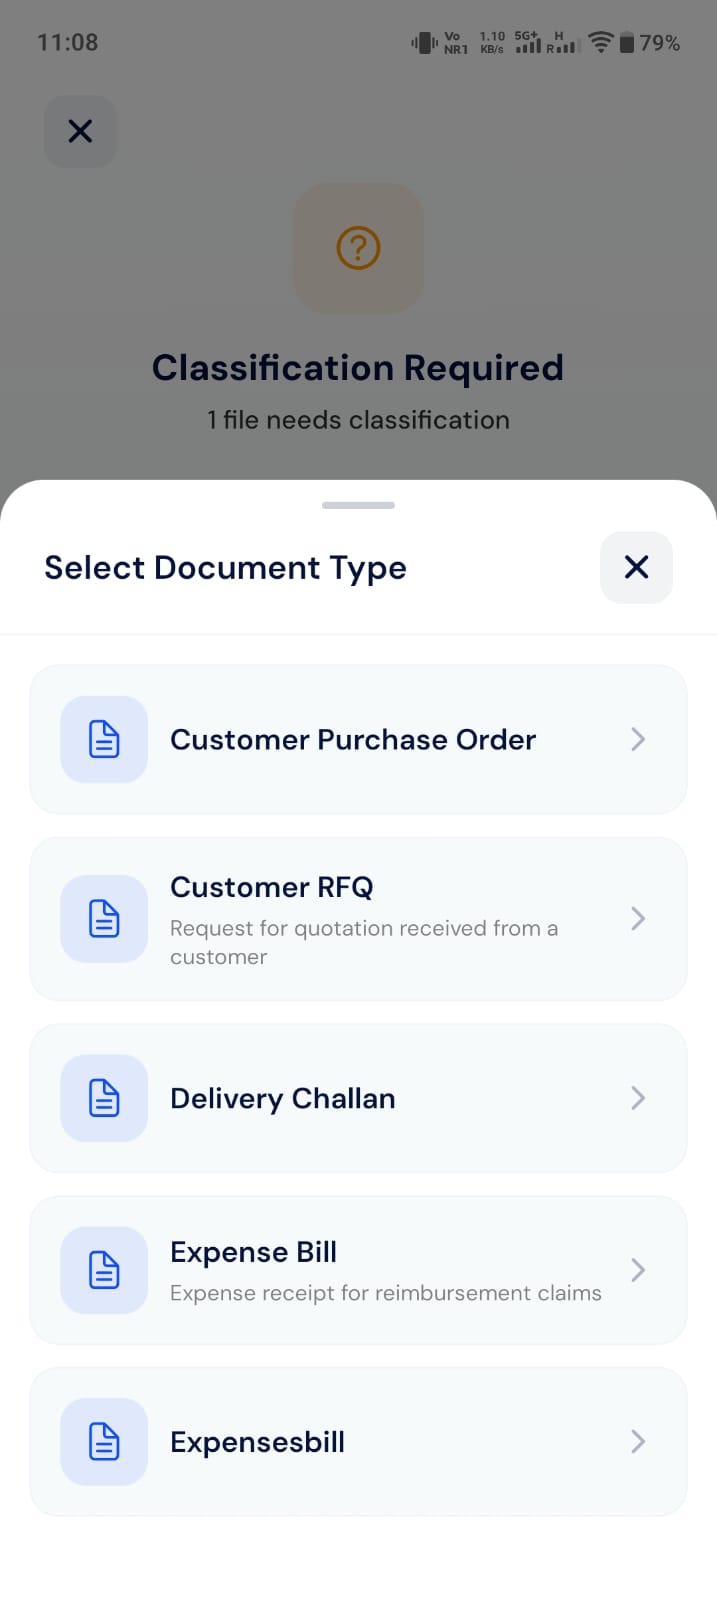
Select Document Type sheet listing available document types
Scroll the list, then tap the type that matches your document (for example, Vendor Sales Invoice). After you choose, the app resumes and extracts the fields specific to that type.
The document types you see come from your workspace configuration, so the exact list can differ from one workspace to another.