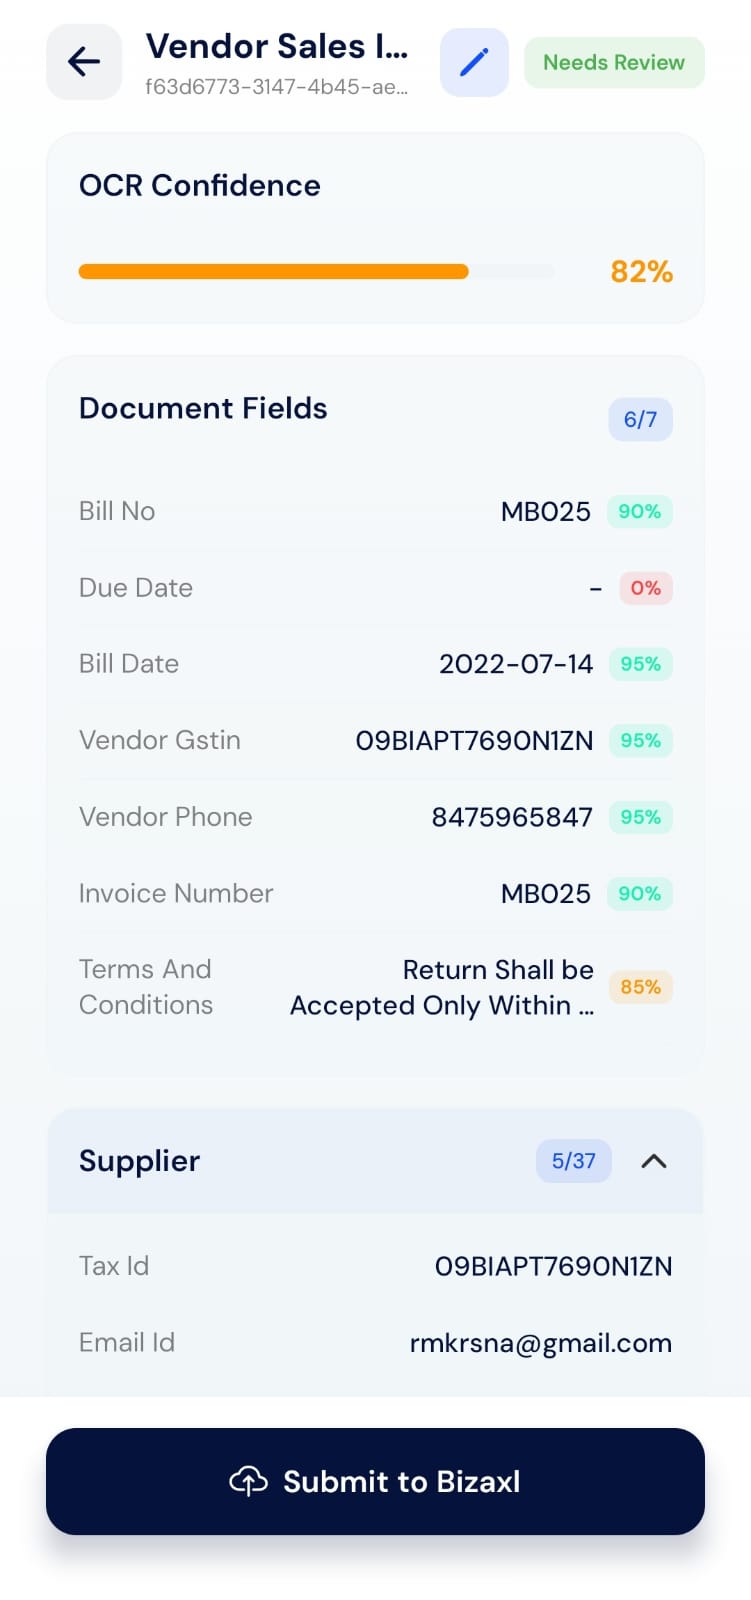
Once OCR finishes, the document opens on its detail screen with an overall confidence score and the fields the app extracted. This is where you check the results and fix anything the OCR got wrong or missed.
Document review screen showing OCR confidence and extracted fields

Understanding the review screen

Fields with low or 0% confidence (such as a missing date) are the ones to check first. A 0% score usually means the value was not found and you should fill it in.
Always review low-confidence and missing fields before submitting. Submitting unchecked values can create incorrect records in your workspace.

Editing fields

Tap the pencil icon at the top of the review screen to open Edit Document. Every field appears in an editable box next to its confidence score.
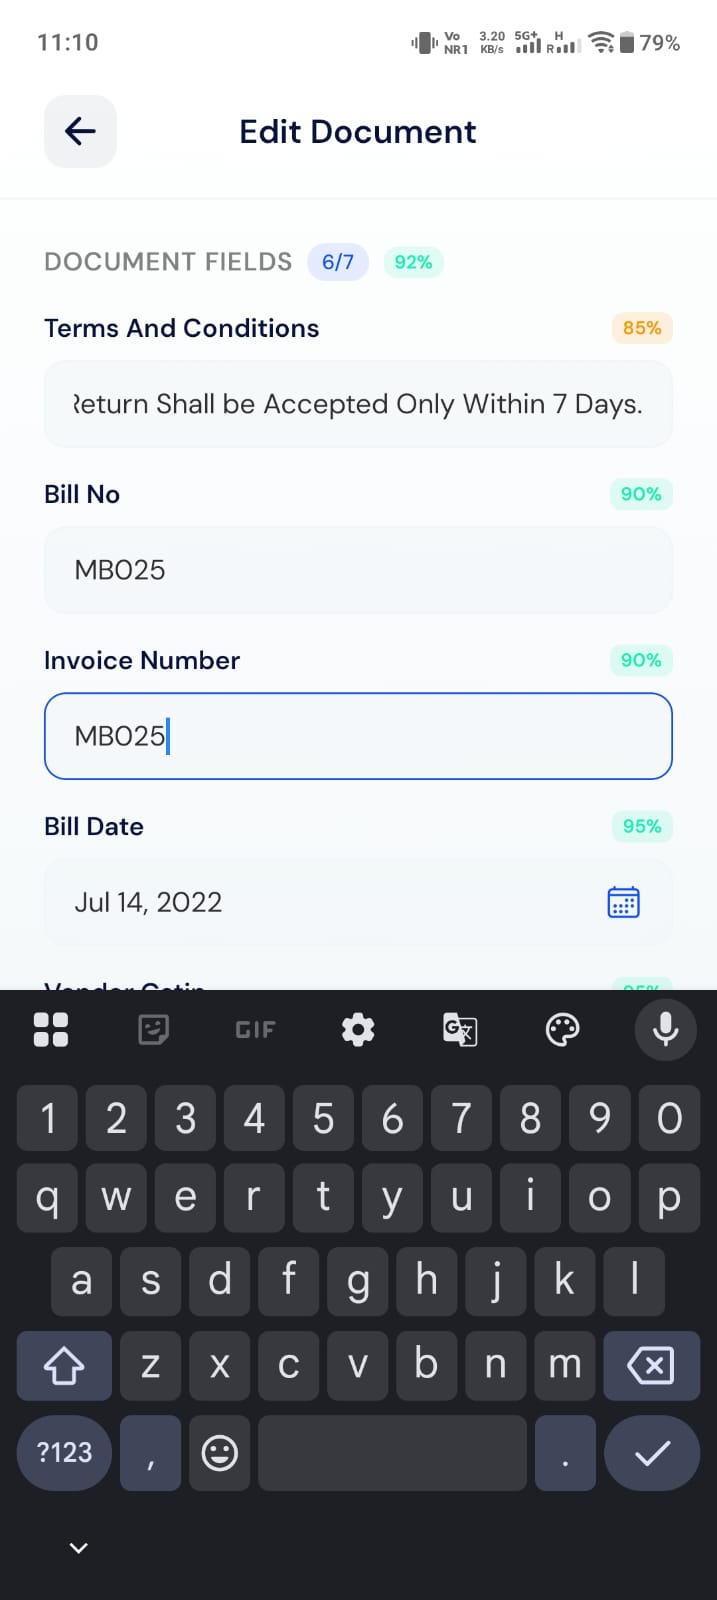
Edit Document screen with editable fields and confidence scores
1

Correct text fields

Tap into any field (for example, Invoice Number) and fix the value.
2

Pick dates

For date fields such as Bill Date, tap the calendar icon and choose the correct date.
3

Search linked values

For fields that link to workspace records (such as an item, supplier, or customer), start typing to search and select the correct match.
4

Check long text

Review long fields such as Terms and Conditions carefully. OCR confidence is often lower on paragraphs.
5

Return to review

When every field looks right, go back to the review screen.

Line items

For documents such as purchase orders and invoices, line items appear in a table. Expand a row to see and edit all fields for that line, including item, quantity, rate, and amount.

If processing failed

If a document shows Failed, its detail screen explains why, listing any failed validation rules. Use Retry Processing to run OCR again once you have addressed the cause (for example, re-uploading a clearer image).